Hi, I’m Nathan Brooks, and let me tell you—nothing snaps you into homeowner mode faster than a mysterious drip from the ceiling. The first time I dealt with it, I felt a mix of panic and confusion. Was it just condensation, or something worse? Spoiler: it was a roof leak, and it wasn’t going away on its own.
Fixing roof leaks became my weekend project, whether I liked it or not. I wasn’t planning on learning how to seal shingles or inspect flashing, but here I am—smarter, more capable, and a little bit proud. Through trial, error, and some YouTube rabbit holes, I figured out what really works.
In this post, I’m going to walk you through the same steps that helped me fix my own leak. This isn’t some corporate advice column—it’s a hands-on guide from a guy who’s been on the ladder, tarp flapping in the wind, just trying to keep the rain out.
What Causes Roof Leaks in the First Place?
Let’s start at the source. Fixing roof leaks isn’t about slapping on some caulk and calling it a day. You have to understand why the leak started.
For me, the first time was a cracked shingle right where water funneled during storms. The second time? Worn-out flashing around the chimney. The truth is, fixing roof leaks begins with identifying the real issue—and it’s rarely just one thing.
Here’s what might be causing your leaks:
Broken or missing shingles
Rusted flashing
Clogged gutters pushing water under the roofline
Cracks around vents or skylights
Ice dams that form in colder climates
It can be overwhelming, but I promise—once you start looking with intention, the source becomes clearer.
Step 1: Start with a Visual Inspection
The first thing I did when I noticed my leak was grab a flashlight and head into the attic. I looked for water stains, mold, and dark spots. These areas helped me trace the leak back to the roof.
Once outside, I carefully walked the roofline and spotted the culprit: a couple of cracked shingles right above the stained area. Fixing roof leaks is a lot easier when you see the damage. Take your time, and don’t rush the inspection—it sets up everything else.
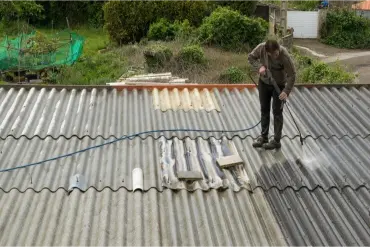
Step 2: Wait for Dry Weather, Then Patch It Right
Here’s something I learned the hard way: fixing roof leaks in wet conditions is not only unsafe, it’s pretty much useless. Patches don’t stick, and it’s harder to pinpoint the leak source with active water flow.
On a sunny day, I replaced the damaged shingles using a pry bar and roofing nails. I applied roofing cement under the edges for extra grip. It wasn’t complicated, but doing it right made all the difference.
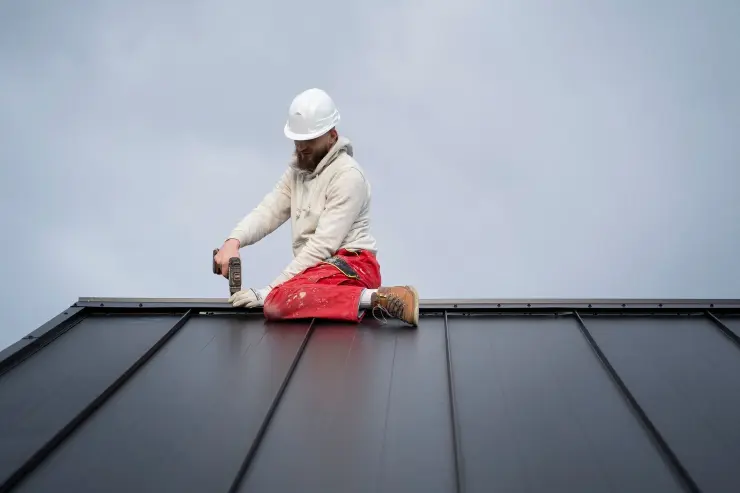
Step 3: Don’t Ignore Flashing—It’s a Common Weak Point
One of my leaks came from old flashing around the chimney. I hadn’t even considered that area when I was first looking. Once I removed the deteriorating seal, I saw how much water had been sneaking through.
Fixing roof leaks sometimes means digging into areas you don’t expect. I replaced the flashing with new metal strips, applied sealant generously, and made sure there were no gaps where water could sneak in.
Step 4: Gutters Are More Important Than You Think
The third time my ceiling dripped, I didn’t even think it was a roof issue. Turns out, my clogged gutter was overflowing, pushing water under the eaves and rotting the edge of my roof deck.
Fixing roof leaks isn’t just about what’s above—it’s also about what’s beside. Cleaning your gutters and installing proper downspouts can protect your home from future water damage. I now clean mine twice a year without fail.
Step 5: Skylights and Vents Need Extra Love
If you have skylights or vent pipes, inspect them closely. On one particularly stormy night, I noticed a drip under my bathroom vent. The seal around the pipe boot had deteriorated.
I replaced the pipe boot and used a high-grade silicone sealant around all edges. Since then, no more drips. Fixing roof leaks often comes down to those small, overlooked areas that get pounded by weather every season.
Step 6: Use Roofing Tape for Quick Fixes
Not every leak requires a full repair. Sometimes you need a temporary patch while waiting for help or better weather. Roofing tape was my lifesaver once during a storm when a shingle tore off. I quickly cleaned the area and applied the tape—it held until I could do a proper fix.
It’s not a long-term solution, but it gave me peace of mind. Every homeowner should keep a roll of roofing tape on hand. Fixing roof leaks sometimes comes down to being prepared for the unexpected.
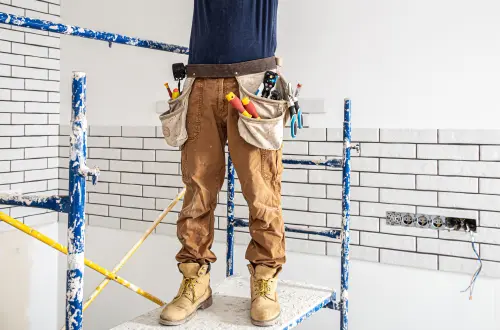
Step 7: Call a Pro If It’s Out of Hand
There’s no shame in calling in help. When I discovered mold in my attic insulation, I knew it was time for an expert. A professional roofer not only confirmed the problem but also found a couple of areas I’d missed.
If you’re unsure or the damage is widespread, bring someone in. Fixing roof leaks isn’t just about plugging a hole—it’s about preventing long-term structural damage. Professionals know how to spot hidden problems and can give you peace of mind.
Final Thoughts on Fixing Roof Leaks
I’ve been there—frustrated, wet socks, staring at a ceiling stain wondering how bad it really is. The truth is, fixing roof leaks taught me more about my home than any manual or blog ever could.
These leaks forced me to slow down, pay attention, and take care of problems before they got worse. I started checking my roof every season, and that small habit has saved me thousands in repairs. It doesn’t take a contractor’s license to make a difference—just some patience and the right info.
So if you’re sitting there with a drip and a headache, trust me: fixing roof leaks is doable. With a little grit and the right tools, you can protect your home, save your budget, and earn the satisfaction of doing it yourself.
Conclusion
Fixing roof leaks felt like an overwhelming job at first, but taking that first step changed everything. Once I identified where the water was sneaking in, the solutions became clearer and way more manageable. Every small fix gave me confidence to handle the next.
The surprising part? How rewarding it is to know I’ve kept my family dry and safe because of something I repaired with my own hands. If you’re anything like me, you’ll find that fixing these issues not only saves your home—it builds your skills and pride in the process.
So here’s your sign. If there’s a leak, don’t ignore it. Start looking today. Fixing roof leaks is less about perfection and more about action. And once you get started, you’ll be amazed at how capable you really are.